Edgebanding can make a big difference in the look and feel of your woodworking projects. It gives edges a professional, finished appearance, particularly for plywood or MDF panels. Among the many tools used in this process, the edgeband end trimmer is essential for achieving clean, crisp edges with minimal effort. If you've ever been curious about how to use an edgeband end trimmer effectively, you've come to the right place.
In this detailed guide, we'll break down everything you need to know about using an edgeband end trimmer, including step-by-step instructions, tips, and pract ical techniques. Whether you're a seasoned woodworker or a DIY enthusiast just starting out, this guide will help you achieve the professional-level finish you desire.
Before diving into the specifics of using an edgeband end trimmer, it's important to understand the fundamentals of edgebanding itself. Edgebanding is a thin material applied to the sides of wood-based panels to cover raw edges, thereby improving both aesthetics and durability. It provides a smooth, finished look that is particularly useful for furniture and cabinets, making them more visually appealing and longer-lasting.
Edgebanding materials can be made of PVC, ABS, melamine, wood veneer, or even acrylic. To apply edgebanding, you typically use an iron, hot-air edgebander, or a hot-melt adhesive tool. Once the edgebanding is properly attached, the ends need to be trimmed for a neat appearance—and that’s where the edgeband end trimmer comes into play.
Trimming the edges of edgebanding helps you remove excess material hanging over the panel’s edge, ensuring that your project has a smooth and flush finish. Without properly trimming, your project may have jagged edges or unprofessional finishes that make the entire piece look untidy. The edgeband end trimmer is designed specifically to make this job easier, faster, and more precise.
To use an edgeband end trimmer effectively, you need the following materials:
Edgeband end trimmer: The main tool for trimming the excess material.
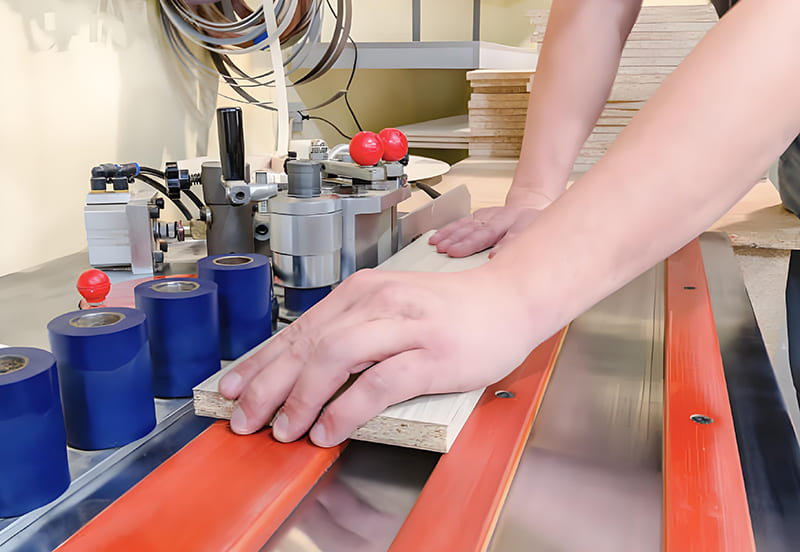
Using the edge banding process gives furniture a high-quality finish. The edge trimmer is an indispensable tool in this process, ensuring the banding is flush with the panel surface without excess hanging over the sides.

Using an edgeband end trimmer isn't complicated, but following the proper steps is important to achieve a perfect trim without damaging the panel or the edgebanding. Here is a step-by-step guide:
Before trimming, ensure that the edgebanding is securely adhered to the edges of your panel. The bond between the edge and the band must be strong. Any loose areas could tear or peel during trimming, ruining your edge.
Apply firm pressure while attaching the edgebanding to ensure a strong bond.
The edgeband end trimmer should be placed at one end of the panel, with the blade flush against the excess edge banding. It's essential to ensure that the tool is held level and aligned correctly to prevent damaging the finish.
Place the tool at a slight angle for optimal cutting action.
Squeeze the handles of the end trimmer together and slide the trimmer forward. This action will slice through the excess edgebanding material, leaving a clean edge.
Move slowly to ensure precision.
After making the cut, inspect the edges for any excess material or rough areas. Use a utility razor blade or sandpaper to clean up any remaining imperfections.
Utility Razor Blade: Useful for detailed trimming in areas where the end trimmer cannot reach.
Finally, give the entire edge a once-over with fine-grit sandpaper to ensure a uniform, smooth finish. This last step ensures the edges are not only trimmed but polished, creating a professional look.

There are different types of edgeband end trimmers available on the market, each suited for specific applications and materials. Here’s a breakdown of the most common types and their utility:
These trimmers are best for straightforward, single-sided trimming. They are simple to use and effective for smaller projects or thin edge bands.
Best For: Small projects, veneer edge banding, or melamine banding.
Double-blade trimmers cut both sides of the edgebanding simultaneously, which is a big time saver for large projects. They provide consistent results with fewer chances of error.
Best For: Larger projects and double-sided tape applications, where both sides need trimming.
Manual Trimmers: Affordable and good for smaller projects where precision is essential.
Choosing the right trimmer depends on the type of edgebanding you're working with, as well as the size of the project. For most DIYers, a single or double-blade manual edgeband end trimmer will do the job perfectly well.
To make the best use of an edgeband end trimmer, here are some practical tips that can help:
Always use sharp edgebander blades: A dull blade can tear or damage the edgebanding, leading to an unprofessional finish.
Extras FW Issue: When using trimming tools, always account for potential errors. Keep extras in case of mishaps to avoid running short.
In any woodworking project involving edge banding, trimming is a critical step. It not only refines the look of the project but also impacts its durability and utility. Rough, jagged edges are prone to peeling or chipping, which undermines the effort invested in the piece. Proper trimming with an edgeband end trimmer is the best way to ensure that your work maintains its value and beauty over time.
The difference between a professional and an amateur finish often comes down to the little details. Trimming is a key detail that shouldn’t be overlooked. By understanding the proper methods and best practices for using an edgeband end trimmer, you can bring your woodworking projects to the next level.
Working with sharp tools means that safety must be a top priority. Follow these safety guidelines when using an edgeband end trimmer:
Wear Protective Gloves: To protect your hands from accidental cuts.
Safety is essential for ensuring that your woodworking projects are completed without injury. By following these precautions, you can safely enjoy the rewarding process of edgebanding and trimming.

Learning how to use an edgeband end trimmer is a valuable skill for any woodworker, from hobbyists to professionals. By following the steps outlined above, you can achieve clean, crisp edges that elevate the quality of your woodworking projects. The edgeband end trimmer is a straightforward tool, but using it properly can make a world of difference in the finished look of your furniture or cabinetry.
Remember, practice makes perfect. Don't be afraid to experiment and try different techniques until you find what works best for you. A well-finished edge not only adds to the beauty of your project but also speaks volumes about the quality and care you put into your craft. With patience and the right tools, achieving professional-level edgebanding is within your reach.
Contact: RicoCNC
Phone: 0086-13390848665
E-mail: cncsale@ricocnc.com
Whatsapp:0086-15264185266
Add: NO. 60, Weixin Road, Industrial Park, Suzhou, Jiangsu, China, 215000
We chat
